
Un "U"sual Chair
- Oct 6, 2022
- 3 min read
When I bought my house several years ago, a bonus was my friend Sandy who already lived just around the corner. Sandy is the kind of friend that lets you come to her garage sale the night before the garage sale. It's great to get first pick of her treasures. And she has excellent taste, so there is always a fab find there. A couple (or so) years ago, she had this very un"u"usal chair at her sale.

I had never seen a chair like this one. The curvature of the back was so interesting.


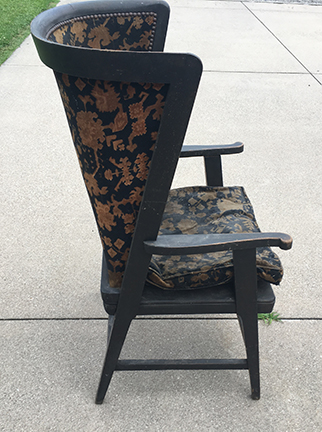
It was also a method of upholstery I had not seen before. The fabric was simple stretched and tacked in place on the front and reverse side of the back of the chair. The fabric was worn in several places and there were small tears here and there. My friend Sandy had said she planned to reupholster it, but had not gotten around to it. So it came around the corner and sat in my garage for a while.

I worked on this chair several times over the last few years. One of the reasons it took so long was the number of decorative and functional upholstery tacks. There was a million of them. Well, I am exaggerating a bit, but to be fair, there was a lot of them and many of them were corroded. I would work on it for a while and then set it aside again. This fall, I was determined to get every tack out. I needed to preserve the existing fabric because I would have to use it to create my pattern for the new fabric.

I gave it a fresh coat of black paint, with one exception.

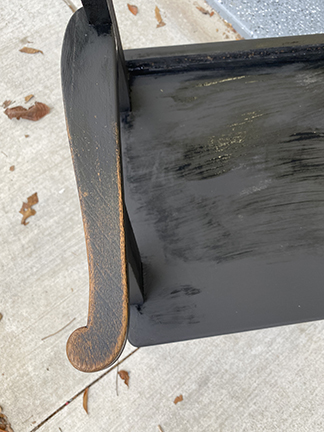

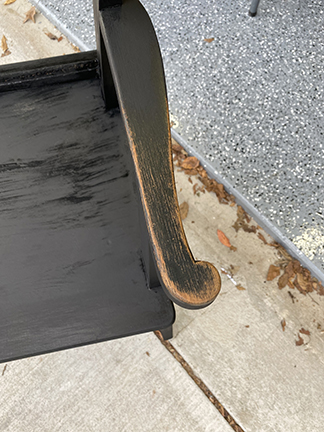
I really loved the worn, distressed look of the arms of the chairs so I painted part of the arms but not all of them. I wanted to be able to blend the new distressed area with the old. Fortunately, it worked pretty well. I distressed the chair all over and gave it a coat of polyurethane in a matte finish.

I cut the fabric using a pattern I made from the old fabric. Starting the the backside of the back of the chair, I stapled the fabric all around the edge of the chair, pulling it taut. I trimmed the fabric down to the edge of the opening.


Then I began adding the fabric to the back of the inside of the chair. I turned the edges under and stapled the fabric as close to the edge as possible.

I used upholstery tack trim to cover the staples. The trim is available in a variety of finishes. This brushed gold complemented the fabric well.

This trim is very easy to use. It is fairly pliable and comes with upholstery tacks to hold it in place every couple inches.

For the seat cushion, I measured the old one, created a pattern and sewed a cover for a new cushion.

And so, after a couple years in my garage, this beautiful chair is ready for prime time again. I think the old distressing blended well with the new and the new fabric and trim is perfect for this chair.
If you like my blog, please follow me on Facebook, Instagram, and Pinterest! Just click on any of the social media links above! Thanks for following me on the junking journey!
Below is an image to pin to Pinterest if you would like to save this idea!


Comments